


balcony wpc cladding exterior wood-plastic composite cladding:Wood plastic co-extrusion Great Wall board sign door head wooden house ceiling wall board outdoor balcony courtyard grille fence anti-corrosion
balcony wpc cladding exterior wood-plastic composite cladding
Description
balcony wpc cladding exterior wood-plastic composite cladding:Wood plastic co-extrusion Great Wall board sign door head wooden house ceiling wall board outdoor balcony courtyard grille fence anti-corrosionWaterproof, anti-corrosion, and insect proof
High density board, durable and long-lasting
Anti slip, anti-aging, scratch resistant, wear-resistant, environmentally friendly and healthy.
Regular 3 meters, 2-6 meters can be customized according to size
Cleaned and easy to install
Complete range of time-saving and hassle saving products
Suitable for various outdoor environments
Pic:Source factory/maintenance free/easy installation/strong flame retardancy/anti-corrosion and dustproof/waterproof and moisture-proof
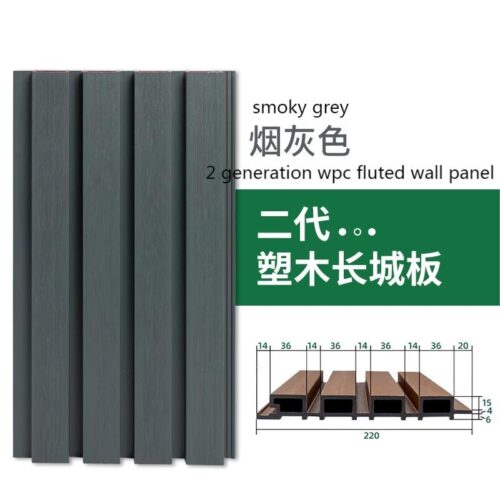
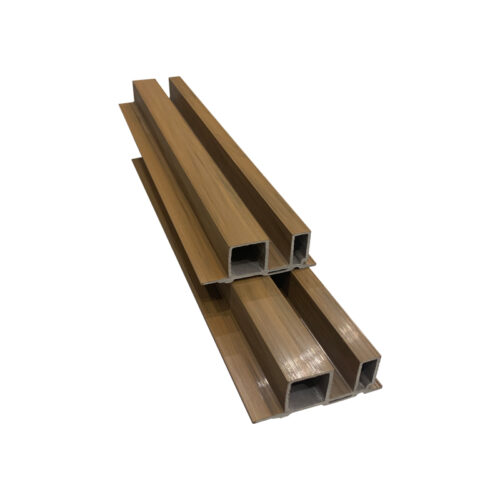
Co extruded wall panel
Outdoor Plastic Wood/Engineering Customization
Source factory
Customized processing
Diverse specifications
Free Follow the Guide
Fast delivery speed
Environmentally friendly 0 formaldehyde
Quality guaranteed/No need for repair and maintenance/Free samples provided
Material: Wood Plastic
Applications: Bathrooms, Living Rooms, Sports Venues, Other Areas
Special Applications: Waterproof, Anti-slip, Wear-resistant, Anti-static, Fireproof, Moisture-proof, Anti-corrosion, Anti-fouling
Style: Modern and Minimalist
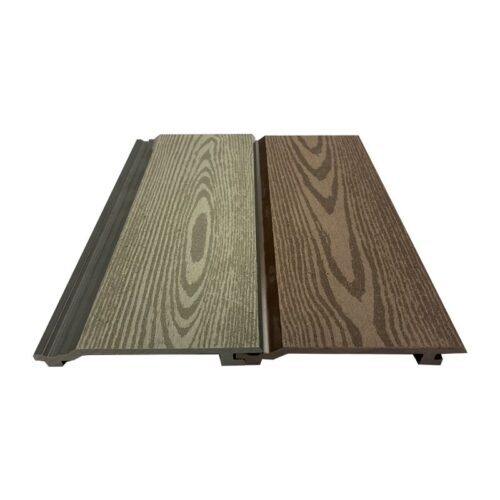
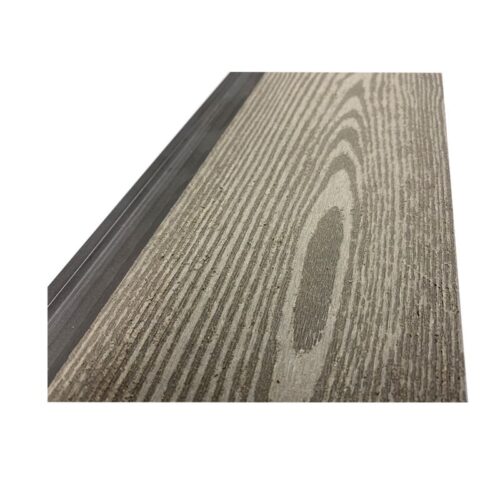
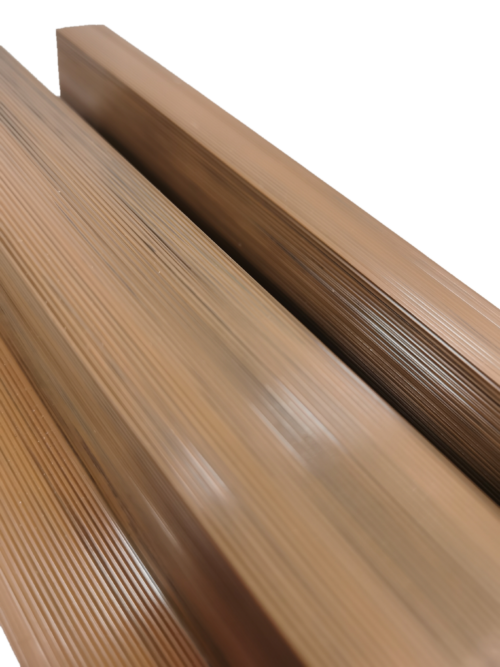
Surface: Wood Grain, Striped, Co-extrusion
Formaldehyde Emission: 0
Floor Thickness: 22mm
Environmental Rating: Formaldehyde-Free
Color-matched Skirting Included: Not Included
Installation Materials: Not Included
Tongue and Groove Type: Snap-on
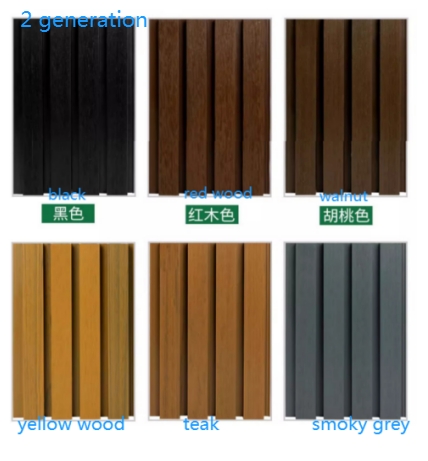
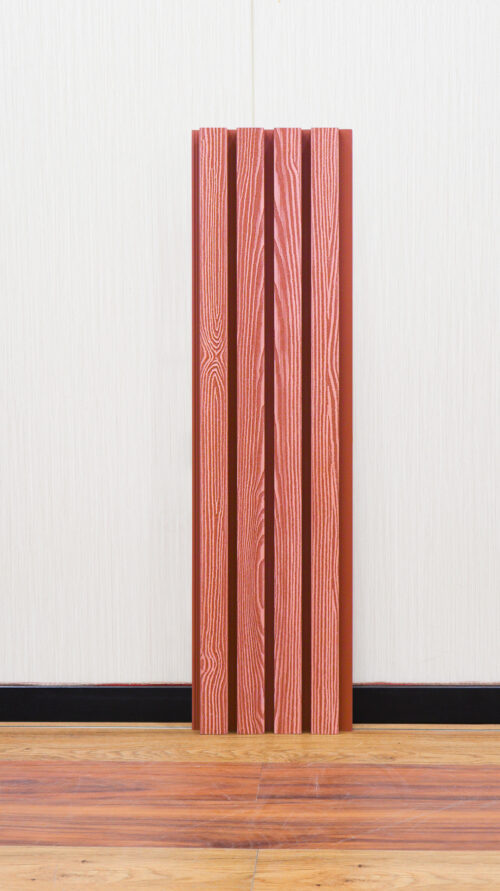
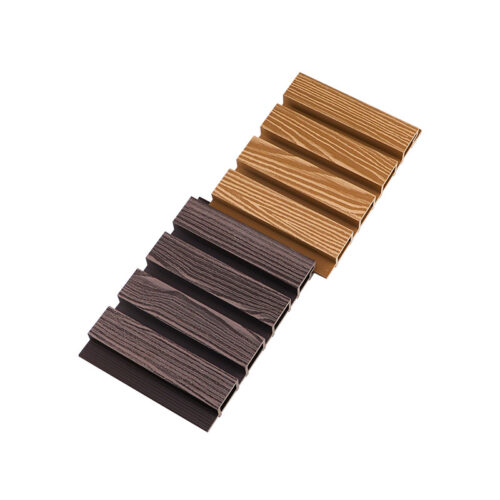
Colors: Mahogany, Teak, Rosewood, Antique Wood, Gray
Dimensions: 220*25


The installation method:
1. Install the keel
Secure the keel to the flat wall surface. The keel must be level with the wall before installing the panels. The spacing between the keel must be strictly controlled within a 50cm radius.
2. fix the panels
Arrange the panels from left to right. Screw the male tenon of the first Wall panel to the keel as the starting panel (first insert the holes). Then, secure the female tenon of the first panel. Insert the second panel into the female tenon groove of the starting panel. Screw in the groove where it meets the keel. Repeat the same process for the remaining panels.
3. Joint Preparation
Cut the appropriate Wall panels to the desired size and make sure the joints are flush.
The connection ports must be secured to the keel.
4. Finishing
Apply finishing lines to the edges of the finished area and window corners to enhance the finish. You can glue the panels directly with Structural adhesive


Project Sharing(Application Pics)


Colors for option:
the 1st generation outdoor WPC decking

the 2nd generation outdoor co extrusion WPC decking

the 1st generation outdoor 3D embossing WPC decking

more our outdoor WPC products:

Reviews
There are no reviews yet.